
This will be at the top of my blog until the offer has expired, so please scroll down for new posts!
 SU! are offering some amazing deals on craft products this month. Be sure to click on the attatchment above and check out the offers...upto 30% off selected products! While stocks last...x
Category:
0
comments
I have been playing around with the Love Story Simply Scrappin' kit which I have had for a while now and have managed to do SO much with! The colour combo is so delicious and they complement each other so well. I made 2 wedding cards and a thank you card. So here is the first one,
 I used everything mostly from the Scrappin' Kit but added the cute little Mr & Mrs stamp from the Occasional Greetings set and inked it in Chocolate Chip and punched it out with the word window punch but used a little trick. I punched it out fully and then put the edge onto a post it note (the sticky bit) then put it back into the punch and lined it up but just punched off the end to make it smaller!
Here is the other one using a different sticker but the same layout;
 I added bling-goes without saying! I used a rhinestone on the sentiment and added dazzling diamonds to the flower image on the sticker by using the 2-way glue pen and then sprinkling the dazzling diamonds on.
 The next was a thank you card again with the same layout. You get 6 sheets of peel off stickers to play with so I used the flowers for this one and a pearl. You also get 8 sheets of textured card stock in each colour including preety in pink, certainly celery, bashful blue and close to cocoa and 6 sheets of DSP all for £17.75.
And there you have it, really quick and easy and very good value for money! x

Here is the other one using a different sticker but the same layout;


And there you have it, really quick and easy and very good value for money! x
Category:
dazzling diamonds,
occasioal greetings,
simply scrappin' kit,
word window punch
0
comments
I have been playing around with the gorgeous Artistic Etchings set and came up with a couple of cards. I love how many ways this set can be used. For the first one I used More Mustard as the main piece of card stock and then gave it a distressed look by using the Spritzer tool with a Chocolate Chip marker pen then cut a piece of chocolate chip card stock and attatched some Very Vanilla ribbon down the middle of it.
 I then used some Bashful Blue scraps and used the Scallop border punch and some Old Olive scraps too and cut just a strip off. I stamped the crown in old Olive and the key in Chocolate Chip and for the sentiment from Occasional Greetings, I stamped in More Mustard and again used the Sprizter on the Whisper White card stock.

To finish I used the distresser tool along the edgers and then I got Real Red scraps and scrunched up and adhered to the top right of the image! Oh and I added a gem rhinestone at the top of the crown too! Quite alot of work but it was quite simple and quick and the result is gorgeous I think! x
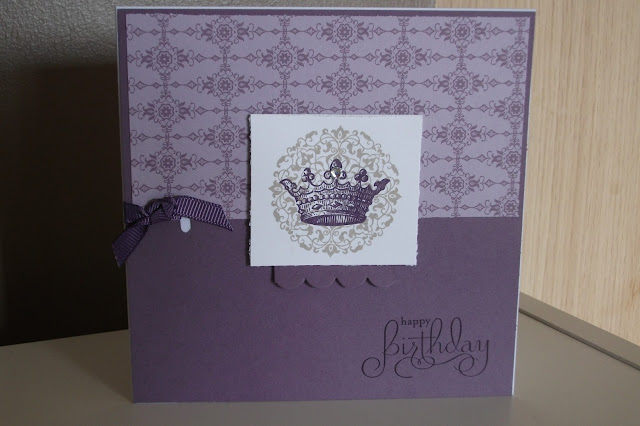
The next I made was simple, I promise! I used perfect plum DSP from the subtles paper stack and mounted it onto a 5x5 piece of perfect plum card stock. I stamped the circle design onto whisper white in crumb cake and the crown in Elegant Eggplant. I used the distresser tool around the edges and used a piece of perfect plum scrap to punch the scallop border punch and mounted with dimentionals. I then used some Elegant Eggplant ribbon to the side of the card and stamped the sentiment in Elegant Eggplant too! I completed this with a perfect little rhinestone in the crown. xox
Category:
Artisic Etchings,
Colour Spritzer Tool,
occasional greetings,
Scallop Edge Punch
0
comments
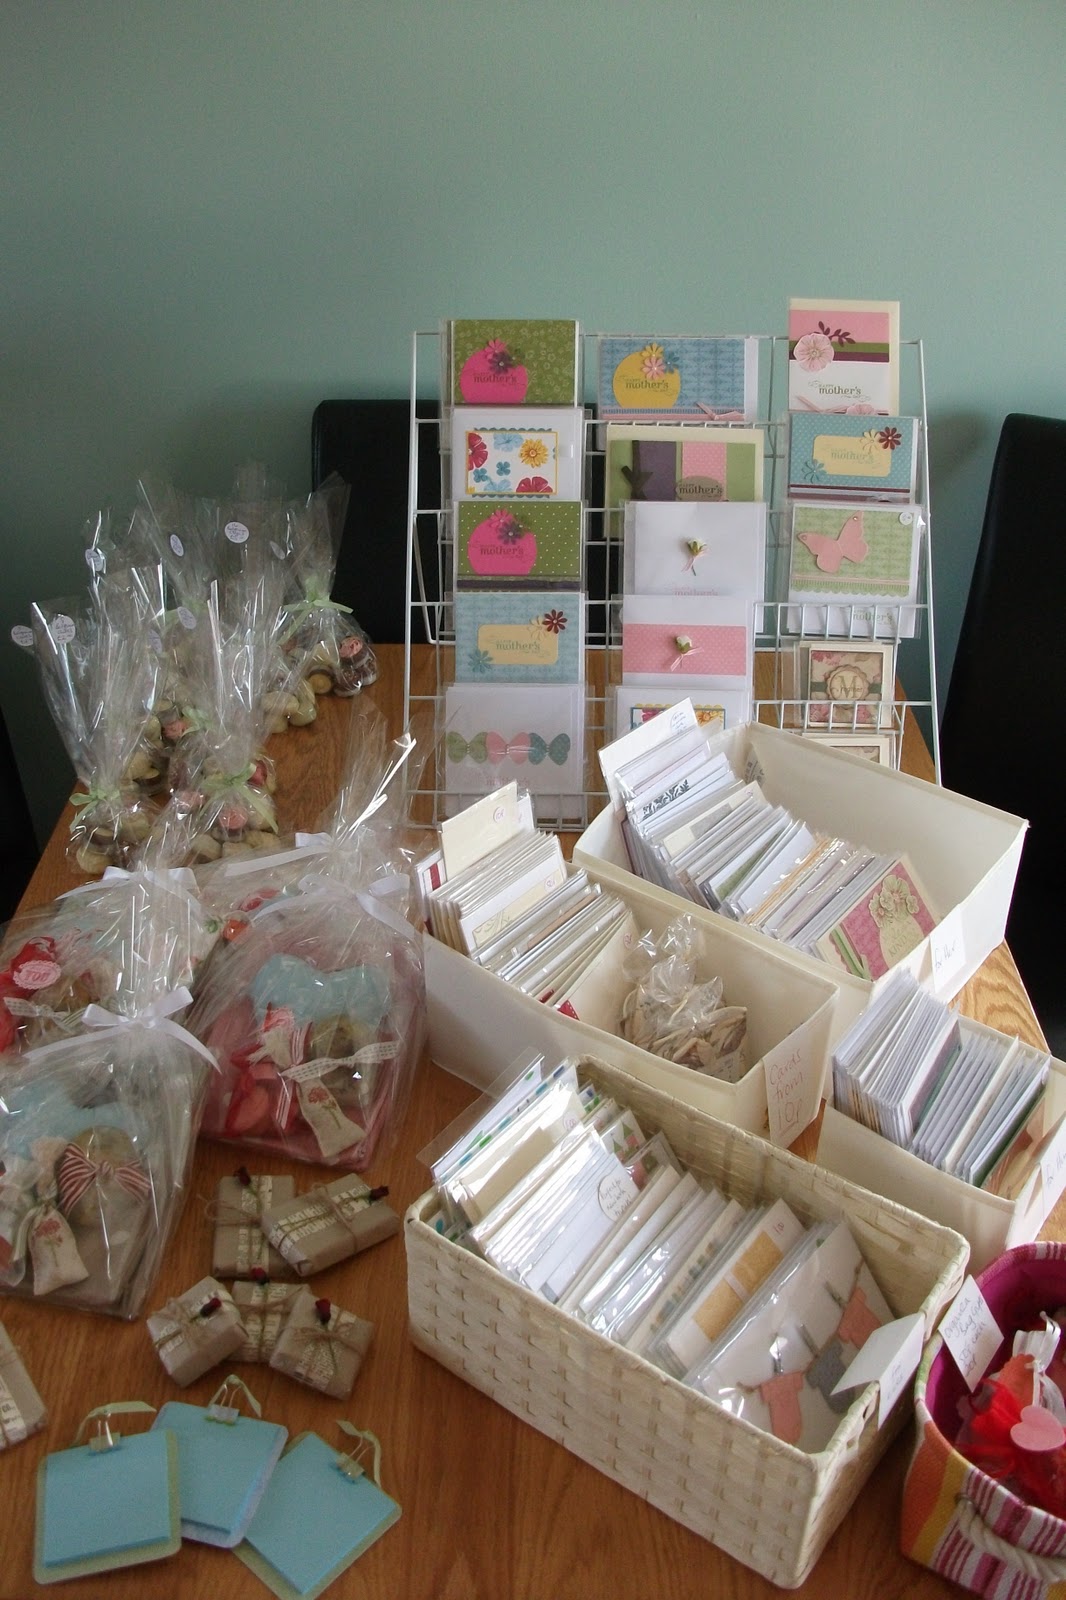
Happy Weekend to everyone! I held a card and gift party on Friday morning and had lots of friends over and had a busy household with toddlers too! I was selling some of my cards and gifts and also a friend made some AMAZING cupcakes and was selling them to raise money for Japan.

I had lots on offer for Mothers Day gifts including my cards, chocs, soap (that I made!!) and gift packs too.

These were the cupcakes!! Delish I have to say and there were only 2 left by the end of the morning so I kept one aside for my son and me! LOL x
I had lots on offer for Mothers Day gifts including my cards, chocs, soap (that I made!!) and gift packs too.

These were the cupcakes!! Delish I have to say and there were only 2 left by the end of the morning so I kept one aside for my son and me! LOL x
Category:
0
comments
I was asked to make a new baby card for someone recently and have the babys name 'Carys' on it. With such a pretty name I needed to come up with something just as pretty so I came up with this...
 The photo makes it look a bit washed out and not as good but believe me, it looked gorgeous! I used pink pirouette, crumb cake and purples for this little number and of course the very cool Broadsheet Alphabet. I punched out each letter with the 1 3/8 circle punch and used a dimensional to adhere over each little babygrow from the Baby Tees jumbo wheel. I tied a little piece of pretty in pink ribbon to the end and used one of the many crowns from the on board pack. I sponged the crown using a dauber in Concord Crush and then used the 2-way glue all over it and sprinkled dazzling Diamonds onto it. I then punched the smallest heart out from the Heart to Heart punch and glued in place with crystal effects. i then stamped the greeting and punched that out with the word window punch. I also used the Hearts 'O Plenty wheel for the top of the card too! I added the sparkly rhinestones to each letter for some bling-after all, it is a little girls card!! xox


Category:
1 3/8 circle punch,
Baby Tees Jumbo Wheel,
Broadsheet Alphabet,
dazzling diamonds,
Heart 2 Heart punch,
On Board Mix and Match,
Scallop Edge Punch,
word window punch
0
comments
Hi I hope you are all having a lovely sunny weekend. I have enjoyed making soap this weekend and it was a good success! Here are some pics,
 I really enjoyed this craft and of course I had to add some SU! product somewhere so i used the wonderful Newsprint DSP to the wrapping and i think they look blooming marvellous and they smell of fresh lemon!!
I have also been making more Mothers day designs-I just can't stop!! I used the Greenhouse Garden 2 step stamps in Regal Rose, Basic Grey, Bashful Blue, Marina Mist, Daffoldil delight and Cajun Craze and Pink Pirouette. The combo of all these colours were amazing, check it out...

I mounted this onto marina mist card stock and finished off the card with 2 strips of daffodil delight scalloped edges and the sentiment from my fave, occasional greetings stamped in rose red! xox
Today I am sharing a card I made with the stunning vintage Artistic Etchings stamp set. I love this set so much. I mounted Crumb Cake onto Early Espresso, then onto Very Vanilla. I used the Spritzer tool which again I love, with the Chocolate chip marker pen. I then stamped the Eiffel Tower in choc chip and the background stamp in crumb cake. I ran the music notes wheel along the bottom and tore off to give that vintage look. The sentiment is from the wonderful Occasional Greetings and I punched this with the word window punch.
 I then made the flower by punching out 6 scallops in the Newsprint DSP and cut into each slot to the middle but leaving them in tact. I then wet them on each side using the Aqua Painter and screwed them up-I know, but do not panic! Once all where wet and scrunched, I placed one ontop of another and punched a hole with the crop-a-dile and set an eyelet. I then glued onto the card with the tom-bow glue. I finished the card with a strip of razzleberry satin ribbon and a scalloped edge strip of razzleberry card stock! Phew, sounds alot but it was actually quite quick!! xox

Category:
Artisic Etchings,
Music Notes Wheel,
occasional greetings,
Scallop Edge Punch,
word window punch
0
comments


I hope Darren and Gemma have a wonderful wedding day! xox
Category:
1 3/8 circle punch,
Broadsheet Alphabet,
dazzling diamonds,
Scallop circle punch
0
comments
Hello all, today is the third installment of my Mother's Day cards.
 I used the wonderful Colour Coach again and it teamed Baja Breeze, Daffodil Delight and Pretty In Pink together, which I have to say scream Spring Time to me! They work so well together and I came up with this gorgeous card. I used the Baja Breeze DSP and card stock in Pretty in Pink and Daffodil Delight and Pretty In Pink ribbon. I used the scallop edge punch and stamped the sentiment from Occasional Greetings in B. Breeze. On the flowers i used the gorgeous SU! pearls. A little tip...when using the scallop edge punch, you get left a strip of paper and I hate to waste anything so I have used the strip-just turned it over to get the other design on the back of it, and I used the Snail to adhere it and then put the ribbon underneath! I think it looks very neat and the colours are again, DEVINE!! Bye for now xox

Category:
occasional greetings
0
comments

Category:
2 step bird punch,
Greenhouse Garden,
Medallion Background stamp,
occasioal greetings
0
comments
Hi there Crafters. I hope your weekend is going well. Today I am going to share a Mother's Day card with you. Again it's using some of my new stamps and papers and inks and I am bursting with ideas that I have to make to here it is...


I have used the stunning colour combo of Certainly Celery, Blushing Bride and Early Espresso. The gorgeous flower set is Greenhouse Garden, I stamped in Pretty In Pink and used the shadow colour- Chocolate Chip. I used the sentiment from Occasional Greetings which I am loving! Hope you like it, bye for now xox
Category:
Greenhouse Garden,
occasional greetings
0
comments
Hello there! My Stampin' Up! starter kit arrived this week and I have been having so much fun playing with all my new stamps! I am going to share some with you over the coming weeks as I plan my first workshop. If you live in the area of Reading and are interested in coming along to stamp then email me at lydia@championcardsstore.com.


The first picture is one I made using mainly punches. I punched out 2 hearts in whisper white with the extra large heart punch and then one in basic black and one in blushing bride. I made a small cut in the middle of the black heart and folded down the top to make a 'dinner jacket'. I then cut a bow tie out in basic black and glued onto the white heart with the two way glue pen-perfect for these little jobs! I layered the hearts ontop of one another and used the Snail to adhere onto the card. I then took the Blushing Bride heart and layered just above the white heart and stuck onto the card. I then took some SU! rhinestones and and positoned them onto the heart. I used my crimper on a strip of basic black card and used the Always sentiment from Always Elegant, stamped in Pretty in Pink and punched out using the Oval punch. I finished off by putting 2 more gorgeous rhinestones on either end of the black strip. A stunning wedding card!

The next one card I JUST LOVE!!!! I have used a new favourite colour combo of mine, Very Vanilla, Rose Red and Certainly Celery. They just look devine together and by using the new Stampin' Up! colour coach, it's easy to create great combos. I used Rose Red paper from the new Subtles paper stack and the lovely sentiment from Occasional Greetings inked in Certainly Celery. I then used the stunning Greenhouse Garden set and stamped the flowers in C. Celery again and then Red Rose for the insides of the flowers. I cut these out and used 2 tiny pearls in the small flowers to finish it off! Gorgeous! xox
Category:
Always Elegant,
Crimper,
Full Heart Punch,
Oval Punch
1 comments
Happy 1st of March to you all! Only 29 days till my birthday!!! Today I am sharing an elegant card using the Always Elegant stamp set from Stampin' Up!
 I stamped the gorgeous image in Crumb Cake and added 2 sparkly rhinestones at the top and bottom. I then used some crumb cake card stock and the scallop edge punch, layered a 2cm piece of Elegant Soiree DSP and then tied some Certainly Celery ribbon around the card. I did photograph two versions of the card with the ribbon along the top, but I think I prefer this one!
Bye for now xox
Bye for now xox
Category:
Always Elegant,
Scallop Edge Punch
0
comments